RAMPS 1.4 Essential Guide to 3D Printing Mastery
The RAMPS 1.4 control board is used as a driver board for 3D printers, and it is easy to place it on the MEGA 2560 control board.
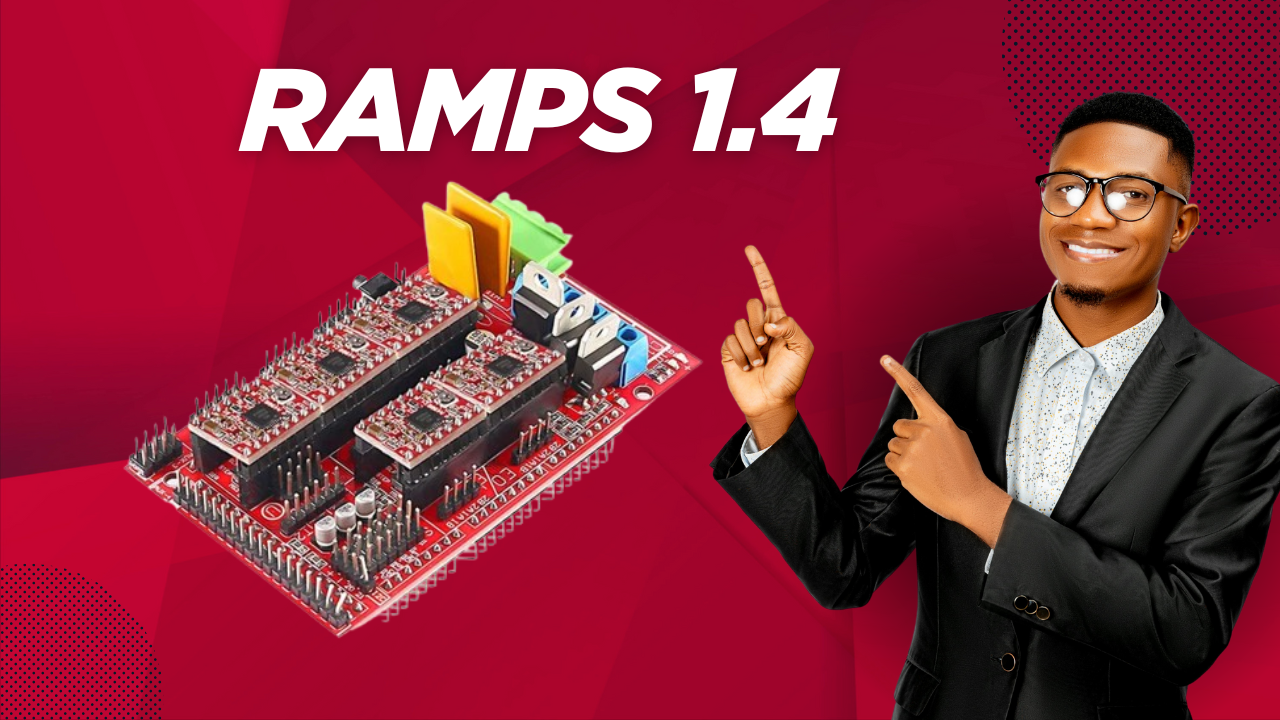
The RAMPS 1.4 board is used in around 75% of DIY 3D printers. This board revolutionizes 3D printing by enhancing precision and simplifying complex settings. For both beginners and professionals, it is essential, as it performs impressively with Arduino Mega. Let's look at how your 3D printing abilities could improve with the RAMPS 1.4 board.
Understanding the RAMPS 1.4 board is essential whether you're upgrading or starting from nothing. It increases print accuracy and helps to simplify difficult configurations. It will enable you to accomplish exact motions and effective power consumption, hence generating new opportunities for your projects.
For do-it-yourself 3D printers, the RAMPS 1.4 board is the first choice. It offers many features meant for both novice and experienced users. Its adaptability and customizing ability for 3D printing come from its fit with Arduino Mega and support of many components.
Knowing RAMPS 1.4: Brain of Your 3D Printer
Acting as the brain of your printer, the controller board is very vital in 3D printing. Knowing its characteristics and advantages—including its suitability for Arduino boards and capacity to grow using more stepper drivers—is crucial. For those who like 3D printing, this kit offers a versatile and customizable foundation.
The performance of your printer depends mostly on firmware. By using the correct firmware, your printer will be able to perform as it should, thereby guaranteeing excellent prints. Furthermore, important for safe and effective functioning is correct wiring. The need for establishing the correct connections is highlighted by improper wiring damaging the boards.
For 3D printing, RAMPS 1.4 has numerous useful qualities. Included are:
- Five stepper driver sockets for X, Y, Z, and two extruders.
- Three high-power switching outputs, one for heated beds.
- Headers for three thermistors and six potential endstops.
- Five extension headers and a specialized header for RC servos.
RAMPS 1.4 is a versatile and customizable platform with an open design and modular architecture. In 3D printing, it's fantastic for novice as well as expert users.
Starting your RAMPS 1.4 Board
Knowing what the kit contains will help you to get your controller board going. Along with A4988 stepper drivers, a shield, jumpers, and an Arduino Mega 2560 board, it comes It also has a USB cable, other wires, and an LCD. A good setup depends on a knowledge of these elements.
Since it shows how various board sections are linked, the schematic diagram is critical. Referring to this graphic will help you to precisely set up your controller board.
Key actions for beginning with your RAMPS 1.4 consist of:
- Via a USB connection, connect the Arduino Mega 2560 to your PC.
- Get the U8glib library.
- Please arrange the board parameters according to the Ramps 1.4 schematic.
- Take great care handling the board to prevent damage.
Basic Parts of a RAMPS 1.4 Kit
In 3D printing, correct components are very vital. Many people choose the controller kit, as it has everything most 3D printers require—including stepper drivers and the Arduino Mega 2560 board. This kit is a fantastic choice for changing your 3D printing configuration.
The package is perfect for many types of 3D printers. It comprises the shield for the Arduino Mega 2560, which links all the main parts. To improve your arrangement, you may even add fans and heated beds.
A RAMPS 1.4 suite consists mostly of:
- Arduino Board Mega 2560;
- RAMPS 1.4 Shield;
- Stepper drivers;
- Heated bed;
- Fans;
- Thermistors.
These pieces create a robust 3D printing system. The device runs with Marlin firmware and Arduino IDE. This software facilitates simple customization of your 3D printer.
You may also have heated mattresses and additional stepper motors, among other extras. The package is compatible with many software choices. Using an Arduino Mega 2560 and a RAMPS 1.4 kit will produce incredible prints.
RAMPS 1.4 Wiring Guide: Correct Connecting Guide
You have to connect your RAMPS 1.4 board properly to ensure it runs as it should. The 1.4 schematic ramps help you to connect the thermistors, heaters, stepper motors, and endstops.
Special places for the stepper motors—X, Y, and Z—abound on the RAMPS 1.4 board. For every axis, you will need another motor. Its capacity is five motors. There are other sections in the wiring for thermistors, endstops, and heaters.
The following is a brief list of the key relationships:
- The X, Y, and Z axes are stepper motors.
- Heaters: Extruder and heated bed.
- Two thermistors for extruders and one for the heated bed.
- Endpoints are X Min, X Max, Y Min, Y Max, Z Min, and Z Max.
For 20 amp connections, wire in 14–16 gauge. Polarity has little effect on the thermistor connections. The mechanical endstoppers must be connected to “COM” and “NC,” however.
Your RAMPS 1.4 board will be set up correctly if you know the RAMPS 1.4 schematic and use their 1.4 wiring instructions. These steps will enable you to get print quality and optimal performance.
Steer Motor Configuration and Control
Correct setup of the stepper motors is very necessary for optimal 3D printing outcomes. The motors must be connected to the controller board, which controls the 3D printer's movement, including the X, Y, and Z axes.
Selecting a suitable stepper motor is quite vital. Since they fit the controller board, bipolar stepper motors—like the NEMA17—are an excellent fit for 3D printing. Two-wire drivers like the A4988 or DRV8825 are the perfect drivers for this configuration. Step/dir current control drivers.
Correctly setting the coil current limit is really vital. This technique helps to avoid engine and driver harm. Up to 1A coil current is handleable by the A4988 stepper driver. It can reach 1.5A with a heat sink and active cooling. The formula Vref = Imot x 8 x Rsen can help you to determine the coil current limit: This limit guarantees the stepper motors of your 3D printer operate at their finest.
Important considerations for stepper motor arrangement and control are
- Choose the correct kind of stepper motor—bipolar stepper motors like NEMA17.
- With the A4988 stepper driver, accurately set the coil current limit.
- Select the advised step/dir current control drivers, either A4988 or DRV8925.
Installation and Configuration of Firmware
Install and set the firmware to get your controller board to work as well as possible. Your 3D printer's brain is its firmware; hence, proper outcomes depend on proper setup of it. Usually including Marlin firmware, a common option for controller boards, the setup procedure is simple.
Defining the motherboard, in this example `#define MOTHERBOARD 33, is part of the setup procedure. Though it is advised to alter it to 115,200 for stability, you will also have to set the baud rate to 250,000. The needed version of the Arduino development environment is 1.6.5.
The following guides help install and customize the firmware:
- Please obtain the Marlin firmware and extract it into a folder.
- Open the Arduino development environment, then choose the serial port and board.
- Please upload the firmware to the board and then wait for it to complete.
- Adjust the baud rate and motherboard definition, among other firmware parameters.
Your 3D printer may have started testing with the 1.4 firmware loaded and set on the ramps. Set the extruder temperature to 230°C and the heatbed temperature to 110°C. The stepper motor settings—including the maximum feed rate and microstepping choices—also provide you flexibility.
Features & Modifications of Advanced RAMPS 1.4
The RAMPS 1.4 suite provides many sophisticated tools and tweaks. It's a good fit for Arduino; hence, 3D printing would benefit much from it. It enables dual extruder configurations, therefore enabling more intricate printing of patterns.
Additionally supported by the board are heated beds, which are very essential for printing certain materials. This feature facilitates simple customization of your 3D printing configuration. Whether starting over or updating, the RAMPS 1.4 package is an excellent choice.
Key changes for the RAMPS 1.4 board consist of
- Ideal for printing many materials, the dual extruder configuration lets one produce more intricate and detailed prints.
- Printing certain kinds of materials depends on heated bed configurations, which also serve to raise the general quality of your prints.
- The RAMPS 1.4 board is very flexible, so you may make a great variety of changes to fit your particular demand.
You may improve your controller set by using these cutting-edge tools and changes. Customizing made possible by the Arduino board helps you to fit your system. This can help you to get excellent prints rapidly.
Debugging Typical RAMPS 1.4 Problems
Particularly with setup and wiring, working with RAMPS 1.4 might cause many issues. The key is to identify and correct the source.
Before utilizing their equipment once again, around 80% of users have to tidy their wiring. This statistic emphasizes the great importance of proper wiring and maintenance.
Typical problems consist of endstop configuration errors. The M119 command can help you to see them. Should the endstop indicate that it is activated when it is not, either firmware or wiring may be the cause. Modifying the firmware settings helps to resolve these problems.
- Search for any wire wear or damage.
- Review the endstop configuration and, if necessary, change the firmware.
- See if the endstops are operational with the M119 command.
Common issues may be resolved by following these procedures and ensuring correct wiring and setup. Your RAMPS 1.4 will therefore perform better.
Increasing Print Quality and Performance
Tune motor settings and temperature control to maximize your RAMPS 1.4 configuration. Increase print quality and performance using sophisticated calibrating methods. Key for exact control over motions and temperature is the RAMPS 1.4 firmware.
Think about the filament kind, printing speed, and layer height when optimizing your configuration. Smoother prints might come from using premium PLA filament along with a controller kit configuration. Additionally, helping to minimize warping and enhance the finish is changing the speed and layer height.
Use these guidelines and play around with settings to maximize your controller set. Perfect control and customization depend on a strong basis provided by the firmware.
Many benefits come from maximizing print quality and performance. Faster speeds, more precision, and higher general print quality will all show. Problems like warping will be under control. Your system will be fine-tuned to provide professional-grade outputs.
Maintenance and Long-Term Care
Regular maintenance is essential if you want your RAMPS 1.4 system to be working flawlessly. This implies treating and storing it only to prevent harm. The lifetime of your RAMPS 1.4 suite depends on this.
These pointers will help you maintain your RAMPS 1.4 board in the best condition:
- Keep the board and its components routinely clean.
- Please check for any loose connections and secure them if needed.
- Change the firmware to include repairs and the most recent features.
These suggestions will help your RAMPS 1.4 kit last longer. It will continue to run for you perfectly. Proper maintenance of the thermistor connections is quite vital.
Your RAMPS 1.4 board should last many years with proper maintenance. The thermistor connections will enable you to produce excellent 3D prints. Your initiatives will be realized.
Conclusion
It is abundantly evident as we conclude our investigation of the RAMPS 1.4 board that any 3D printer fan is a must-have. You know now how to connect it, set it up, and solve typical difficulties. This information will help you master the RAMPS 1.4 path.
Maximizing your controller board includes configuring it correctly, adjusting it, and keeping it in excellent shape. You will be able to produce stunning prints again and again with this book. See the wonderful prints you can get by fully using the board, experimenting with various settings, and so on.
The controller board has many options regardless of your experience with 3D printing—new or long-standing. Use this adaptable, reasonably priced controller to realize your 3D printing ideas. Content printing is happy.